
Feel free to contact.

22 May 2025
In this blog I will be going over how to deploy a python django app for free on heroku server. One might consider this solution just for the sake of project being live maybe to show someone or if you are working on a mobile app whose api is developed in django and you want to deploy the api right away on a staging environment and even better if its free and you don't care about the domain name because for heroku free instance its going to be "youapp_name.herokuapp.com" and you are also getting SSL for free as a bonus. Well that's alot of good for free.
we will start by prepping the code to be ready to push to heroku.
requirements.txt file should include
dj-database-url==2.3.0
Django==5.2
gunicorn==23.0.0
whitenoise==6.9.0
django-on-heroku
psycopg2
add following to Procfile (no extension of this file like .txt or anything)
web: python manage.py migrate; gunicorn mysite.wsgi --log-file - --log-level debug
By adding the migration command, you would not need to run the migrations manually.
now to configure your settings
settings.py
add your domain name in your allowed hosts like
ALLOWED_HOSTS = [
 "deployingdjango.herokuapp.com", "localhost", "127.0.0.1"
]
add whitenoise middleware
MIDDLEWARE_CLASSES = (
    # Simplified static file serving.
    # https://warehouse.python.org/project/whitenoise/
    'whitenoise.middleware.WhiteNoiseMiddleware',
    ...
and set it as static files storage it will be used to serve static files on server
# Simplified static file serving.
# https://warehouse.python.org/project/whitenoise/

STATICFILES_STORAGE = 'whitenoise.storage.CompressedManifestStaticFilesStorage'
and finally configure the static paths
BASE_DIR = os.path.dirname(os.path.dirname(os.path.abspath(__file__)))

# Static files (CSS, JavaScript, Images)
# https://docs.djangoproject.com/en/1.9/howto/static-files/
STATIC_ROOT = os.path.join(BASE_DIR, 'staticfiles')
STATIC_URL = '/static/'

# Extra places for collectstatic to find static files.
STATICFILES_DIRS = (
    os.path.join(BASE_DIR, 'static'),
)
In settings.py, at the very bottom, add the following code snippet:
import django_on_heroku
django_on_heroku.settings(locals())
This will automatically configure DATABASE_URL, ALLOWED_HOSTS, WhiteNoise (for static assets), Logging, and Heroku CI for your application.
Now we are ready code wise to be deployed to heroku
Starting from the beginning create a free account on heroku and login to the dashboard at dashboard.heroku.com.
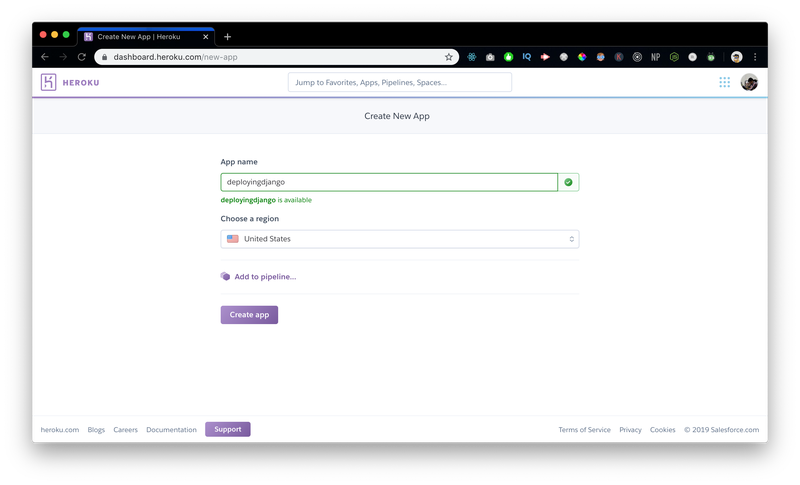
Next step is creating a new app

choose this name accordingly because this name is going to be in the domain so keep it sane 😀
Heroku provides 3 ways to deploy your django app.
we will be going over all three one by one, but which one suits you the best.
Pre Requisites for this is git should be installed download git
in your project directory open terminal and run
heroku loginafter successful login initialize a new local git repository using command
git initthen add all of the files to this git repo
git add .and connect this local repo to your heroku remote repository using given command in heroku dashboard

In this project's case
heroku git:remote -a deployingdjangohere "deployingdjango" is the name of our app which we created in heroku dashboard
now we will simply commit and push the code to heroku.
git commit -am "Initial Commit"This will push the code to your heroku git repository and your website code should be on the server.
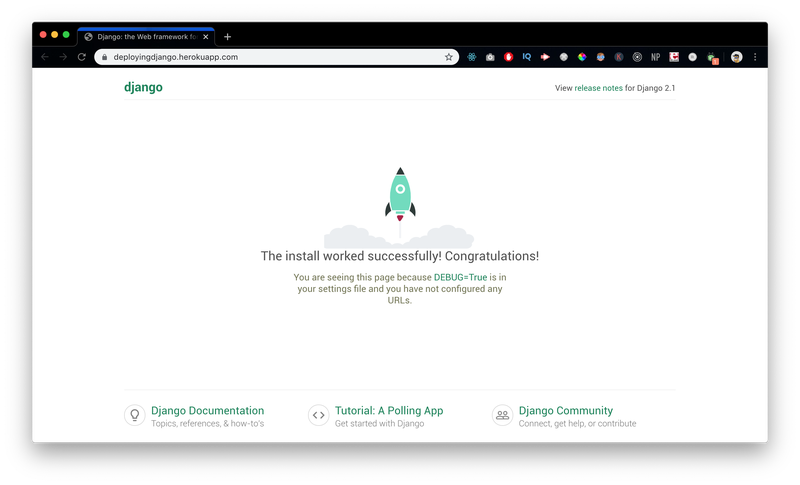
for a blank application now you should be able to see the site working
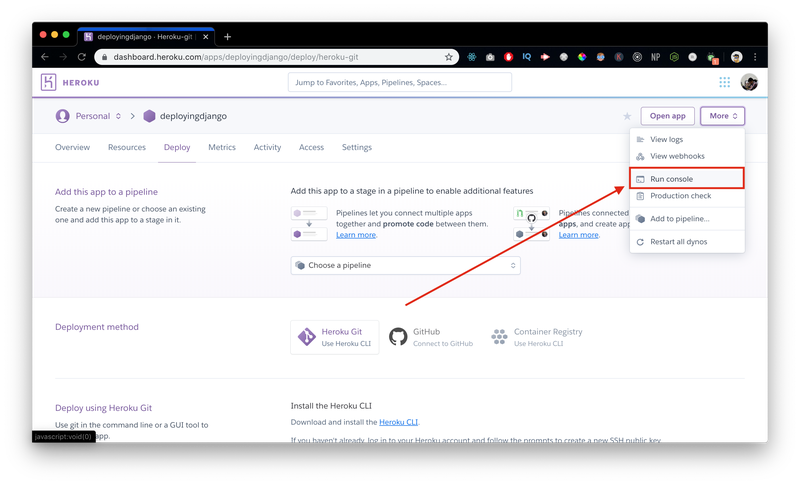
But, if you require to run some commands on the server you can do it from the terminal as well as the heroku dashboard
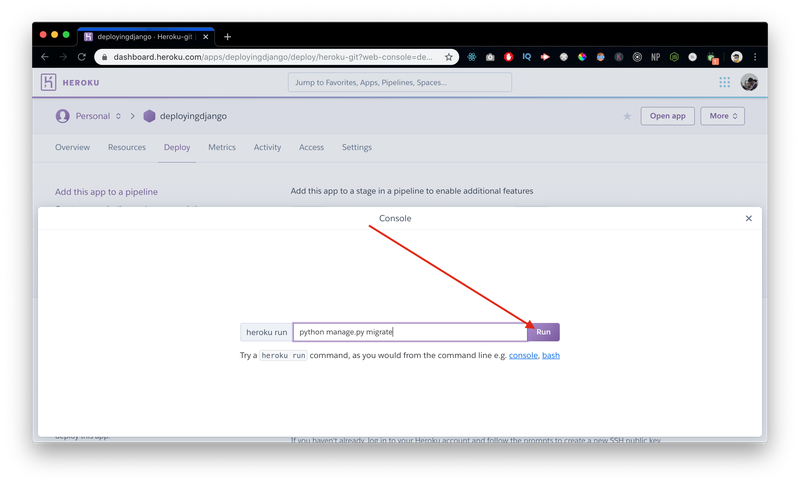
say you want to run a migration command
heroku run python manage.py migratethis will run "python manage.py migrate" command on the server.
if you want to run the migration from outside the terminal in case you don't have the code with you etc in such a situation you can run this command from the server as well.
This way you can run the django commands as well and your changes should reflect on the server.
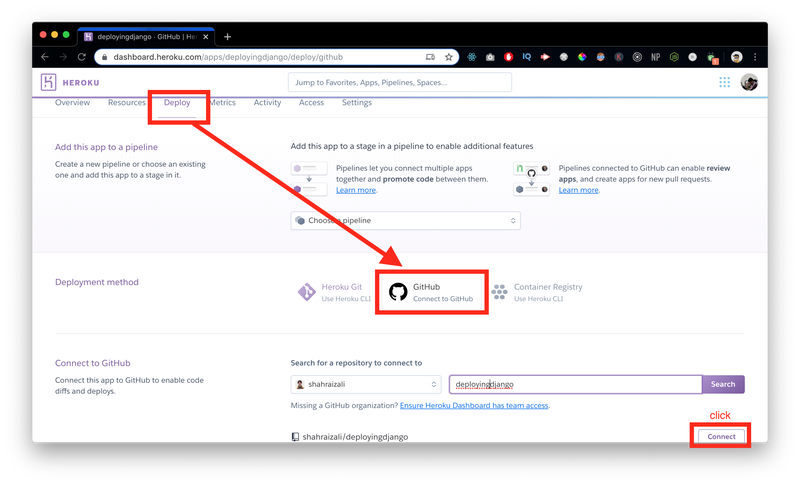
If you want to deploy your code directly from your github account your code should already be on your github account either public or private.
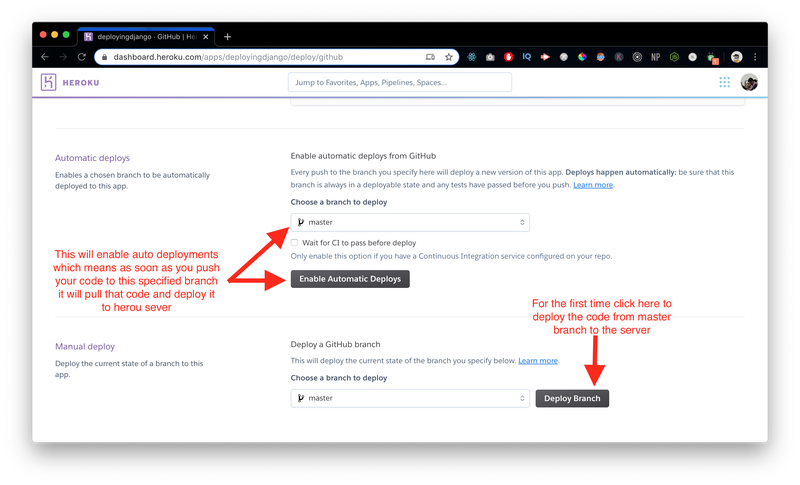
Now the code from this branch will be deployed to heroku and if you enabled the auto deployments whenever you will push or merge the code to master this webhook will detect and deploy that new code to the server as well
NOTE: This will not run manage.py commands which might be compulsory for your change so have to either do it manually or add those commands to the automation flow as well.
Also Its highly recommended to add some test cases for your functionality so that whenever an auto pipeline deployment happens it verifies that all of the functionality is working and only then it deploys the code if all of the test cases pass.


Feel free to contact.
Your Success, Our Support!